Merrowed vs Laser-Cut Patch Borders: Which Edge Fits Your Design?
Choose a merrowed border when your patch has a smooth, fairly regular outline and you want a raised, stitched rim. Choose a laser-cut edge when the outer shape contains points, tight curves or other details that need to stay close to the artwork. Before approving either one, check how much space the edge leaves for your logo and whether the finished sample matches the intended shape.
For a buyer ordering patches in bulk, the edge is more than a finishing detail. It changes the silhouette, the apparent size of the design and the way the patch sits on a hat, sleeve or garment. A border that looks attractive in isolation can become a problem if it crowds the last letter of a logo.
What Is the Physical Difference Between the Two Edges?
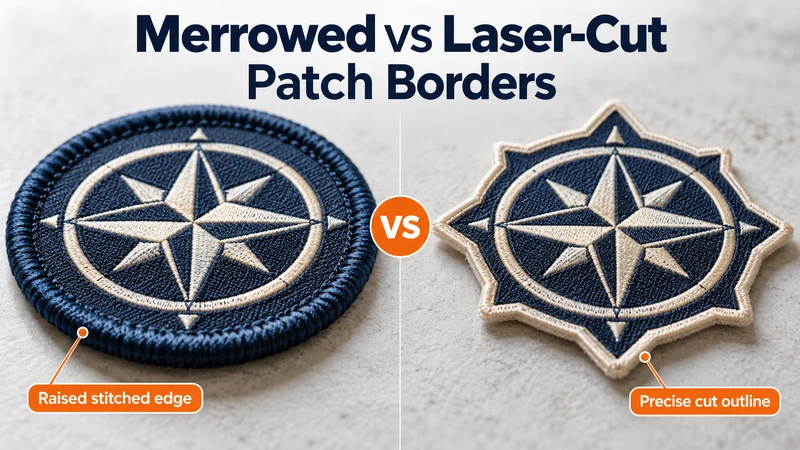
A merrowed border is thread wrapped around the outer edge of a patch. From the front, it looks like a rounded, continuous stitched rim. From the side, it has visible height and texture. It gives many circular, oval and other smooth patch shapes their familiar emblem look.
A laser-cut edge is cut to follow a specified outline. Without an added stitched border, it has a flatter profile and allows the patch’s outer shape to follow more detailed artwork. How the cut edge is finished depends on the fabric and construction, so ask to see the actual sample rather than assuming every laser-cut patch will have the same edge.
There is an important third possibility: a patch can be laser-cut to shape and then finished with a satin-stitched border. That produces a custom outline with visible stitching, but it is not the same construction or appearance as a traditional rolled merrowed border. If you request “laser-cut with a stitched edge,” specify which finished look you mean.
| Feature | Merrowed border | Plain laser-cut edge |
|---|---|---|
| Visual profile | Raised, rounded thread rim | Flatter cut outline |
| Strongest use | Smooth, conventional shapes | Detailed or irregular silhouettes |
| Border as a design feature | Highly visible | Usually less prominent |
| Space around artwork | Needs room for the wrapped edge | May allow a closer contour, subject to production review |
| Critical sample check | Even stitching and a neat join | Clean contour and stable edge finish |
Which Edge Works for Circles, Shields and Complex Outlines?
For a circle or oval, a merrowed border is often an easy starting point. The continuous curve lets the stitched rim read evenly. It is useful when the buyer wants a traditional badge appearance rather than a close-cut logo silhouette.
A shield needs a closer look. A gently rounded shield may work with a merrowed border. A shield with sharp points, narrow corners or deep changes in direction may need a cut edge or another stitched finishing method. Do not decide from the word “shield” alone; send the actual outline.
For stars, mascots, lettering-shaped patches, angular symbols and intricate outlines, a laser-cut edge is usually the first option to explore. The cut can follow details that a bulky wrapped rim would soften or obscure. That does not mean every tiny point is practical. Very narrow projections can still be awkward to produce, attach or use. Ask the manufacturer to flag fragile sections before sampling.
Practical rule: If the silhouette is part of how people recognize your logo, protect that silhouette first. If the patch’s classic stitched frame is part of the look you want, give that frame enough room.
How Does Border Width Affect Small Text and Logo Proportions?
A border takes up space around the patch. On a large emblem, that may be barely noticeable. On a small patch, it can change the balance between the border and the artwork.
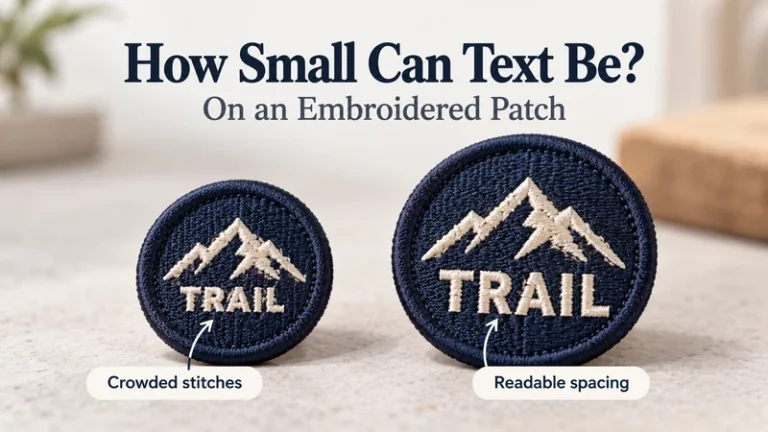
Imagine a compact circular patch with lettering around the outside. Add a prominent merrowed rim, and the letters may need to move inward or become smaller. Moving them inward can crowd the central logo. Shrinking them may make them harder to read. The artwork, finished size and border should therefore be reviewed together—not approved as three separate decisions.
A laser-cut outline may preserve more of a logo’s intended silhouette, but it does not automatically make tiny text legible. Letter clarity depends on the patch size and the method used to make the artwork, such as embroidery or weaving. If small lettering is essential, ask the supplier to evaluate the artwork at its finished size and suggest the appropriate patch construction.
Before approval, request a proof showing:
- The finished outer dimensions, including the edge.
- The artwork at actual size, without zoom.
- The proposed border color or cut line.
- The space between text, logo details and the finished edge.
If that proof feels crowded, the physical patch will not gain extra breathing room during production.
Which Edge Should You Choose for Hats, Sleeves and Chest Patches?
Hat patches
A hat has limited placement space and a curved surface. Check the patch’s finished height and width against the intended panel—not just against a flat artwork file. A bold merrowed border can look intentional on a simple round hat patch. A flatter custom-cut shape may suit a logo that needs a more precise outline.
Ask to see the sample placed on the actual hat style when possible. The right edge on a tabletop is not always the best edge once the patch meets a crown seam or curved panel.
Sleeve and uniform patches
Sleeve emblems often have room for a recognizable border. A merrowed edge can give a round or gently shaped badge a clear visual frame. If the uniform design requires a precise shield, crest or unusual silhouette, review a cut-edge option as well.
Confirm the attachment method and backing with the edge. A neatly finished front does not answer how the patch will be sewn on or otherwise applied.
Chest patches and apparel branding
Chest placements may be smaller and more sensitive to visual bulk. For a subtle brand mark or an irregular logo, a flatter cut outline may be worth testing. For a classic workwear or club emblem, a raised stitched rim may be exactly the intended look.
There is no edge that is automatically best for every placement. View the sample on the product it will actually be attached to.
What Should You Check on a Physical Sample?
Ask for close-up views of the front, side and back, then inspect the physical sample if the edge is important to the order.
For a merrowed border, check:
- Whether the rim looks even around the whole patch.
- Whether curves and corners keep their intended shape.
- Where the stitching starts or joins, and whether that area looks neat.
- Whether the border crowds text or important artwork.
- Whether the finished size includes the raised edge as specified.
For a laser-cut edge, check:
- Whether the cut follows the approved outline consistently.
- Whether points and tight curves remain intact.
- Whether the edge is clean, with no obvious unwanted residue or damaged areas.
- Whether the backing and cut edge work together without an untidy overhang.
- Whether the finished patch sits and attaches as intended.
Compare several pieces if the order will be large. One excellent sample establishes the reference; the bulk order also needs consistent shape and finish. Confirm the approved sample or proof version before production and keep it for inspection and future reorders.
For broader production checks, see our quality control overview.
What Should You Specify When Requesting a Quote?
Send the artwork and state the finished size, intended garment or accessory, quantity, patch type, backing and desired edge appearance. If you are unsure which edge fits, request a recommendation using the same artwork and size for both options.
You can write:
We need a custom patch with the attached artwork at a finished size of [width × height]. It will be applied to [hat/sleeve/chest placement]. Please advise whether a merrowed border or a plain laser-cut edge will preserve the outline and text more clearly. Show the finished outer dimensions, proposed border or cut line, backing and any artwork changes required before sampling.
If you want a stitched border on a complex shape, ask about that specifically. “Merrowed,” “laser-cut” and “satin-stitched border” should not be used interchangeably in the final specifications.
FAQ
Is a merrowed border the same as an embroidered border?
A merrowed border is a particular wrapped-edge construction. A satin-stitched border is another type of stitched finish and can follow some custom shapes. Ask for a close-up sample if the distinction matters to your design.
Can a merrowed border follow any patch shape?
No. It works best with relatively smooth outlines. Tight inward corners and intricate shapes may require another finishing method. The actual artwork should be reviewed before a border is confirmed.
Does laser cutting prevent every edge problem?
No. The result depends on the material, cutting and overall construction. Approve a real sample and check the cut edge, backing and attachment requirements.
Which border looks thicker?
A traditional merrowed border has a more pronounced raised rim. A plain laser-cut edge is usually flatter. A laser-cut patch with an added satin-stitched border will have a different profile from a plain cut edge.
Will a laser-cut edge make small lettering clearer?
Not by itself. The edge affects the available space and outer shape; lettering clarity also depends on the finished size and how the artwork is produced. Review the text at actual size.
Is a merrowed border suitable for a hat patch?
It can be, especially for a simple shape and a deliberately classic look. Check the finished patch size and sample placement on the intended hat panel.
Which should I choose for a shield patch?
Look at the shield’s actual corners and proportions. A soft, rounded shield may suit a merrowed border; a sharply pointed shield may be better served by a cut outline or another stitched finish.
Choose the Edge Around the Artwork, Not After It
Start with the shape customers need to recognize, the size the product can accommodate and the placement where the patch will be used. A merrowed border provides a strong stitched frame for suitable shapes. A laser-cut edge gives more freedom to follow an intricate outline. Approve the finished edge and artwork together before placing a bulk order.
If you are comparing options, send your artwork and project specifications. Include the proposed size, quantity, placement and backing so the edge can be reviewed as part of the complete patch.